When the holiday season rolls around, there’s no better way to get into the festive spirit than with a dazzling set of red and green nails. These two classic holiday colors symbolize everything from cozy fireside moments to glistening ornaments on a tree. Whether you’re attending a Christmas party, planning a photoshoot, or simply love embracing seasonal beauty trends, red and green nails are a chic and playful way to celebrate. Even if you’re not a professional nail artist, these 11 easy holiday nail designs will have your fingers looking merry and bright. Simple yet stunning, these ideas can be created at home with a bit of patience and the right tools. So grab your favorite polishes, some sparkle if you wish, and let’s deck those nails with cheer.
1. Classic Candy Cane Stripes
Capture the sweetness of the holidays with this effortlessly festive candy cane stripe design. Start with a white base to give your nails a crisp and snowy feel. Then, using red and green striping tape or a fine-tipped brush, alternate horizontal or diagonal stripes across each nail. You don’t need steady hands like a pro; a little wobble only adds charm! These stripes mimic the look of real candy canes, making your nails look good enough to eat. For extra flair, apply a thin layer of glitter polish or topcoat for a frosty sparkle. This design works well on all nail lengths and shapes, and it pairs beautifully with a cozy holiday sweater. Best of all, it’s quick to recreate, making it perfect for last-minute party prep. You can customize the width of the stripes or even alternate nails between red and green stripes for a more dynamic effect. Whether you’re baking cookies or wrapping presents, your nails will add the perfect sweet touch of Christmas spirit.
2. Mistletoe Magic Accents
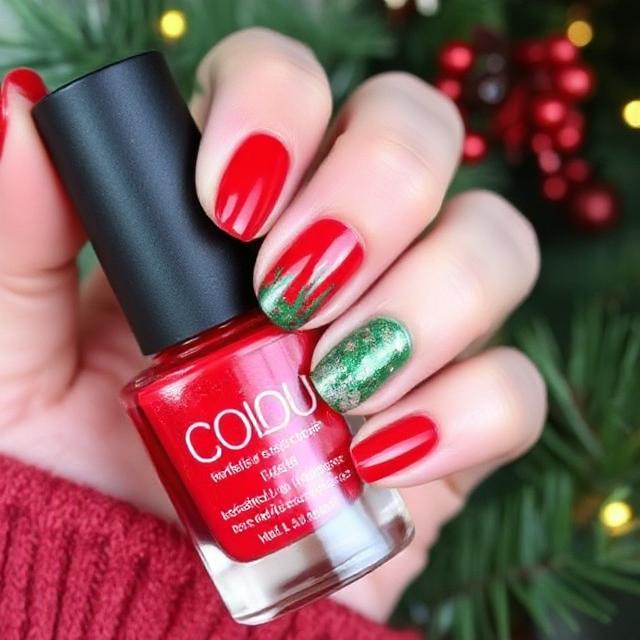
Bring the romance of mistletoe to your manicure with this charming red and green holiday nail design. Start with a deep red base—something like a cranberry or cherry hue works beautifully. Once your base is dry, select an accent nail or two (typically the ring finger and thumb) to showcase delicate mistletoe art. Use a dotting tool or the back of a bobby pin to create little green leaves in a V-shape and tiny white or red berries in the center. If freehand art isn’t your forte, mistletoe nail stickers or decals are a great alternative. Finish the look with a glossy topcoat to seal your design and add shine. This elegant look captures the warmth and romance of the holidays and feels both playful and refined. Whether you’re under the mistletoe or not, your nails will have a flirty, cheerful vibe that’s just right for December outings and date nights. It’s a creative way to channel holiday traditions through your style without being too over-the-top.
3. Festive French Tips
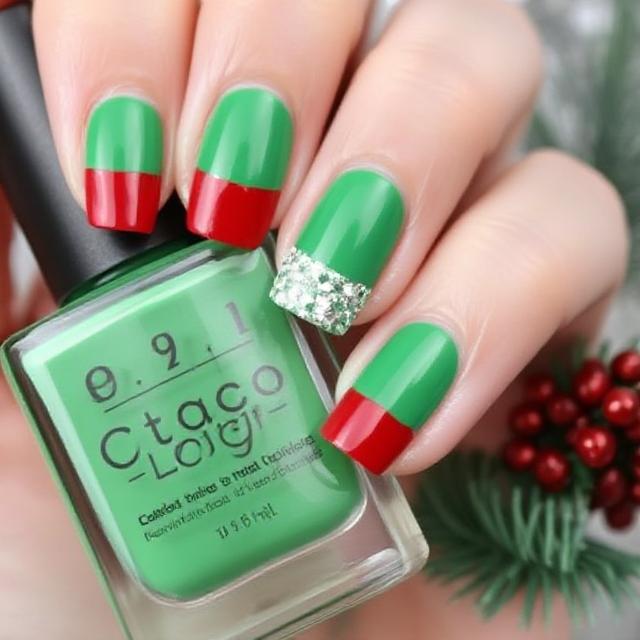
Give the timeless French manicure a seasonal twist with festive red and green tips. Begin with a neutral or sheer pink base to keep your look classic. Then, instead of white tips, alternate between bold red and vivid green on each nail. You can also opt for a split-tip design, painting half the tip red and the other half green for a playful take. For a little extra flair, add a thin line of gold or silver glitter polish just below the colored tips to simulate the sparkle of tinsel. This look combines elegance with holiday cheer, offering a sophisticated but fun option for everything from work parties to Christmas dinners. It’s simple enough to do at home with a steady hand or some nail guides. Whether you choose a glossy or matte topcoat, your nails will exude style and spirit. This design is great if you’re looking for something festive without going full-out Santa mode. Plus, it grows out subtly, so it’s low-maintenance, which is perfect during the hustle and bustle of the season.
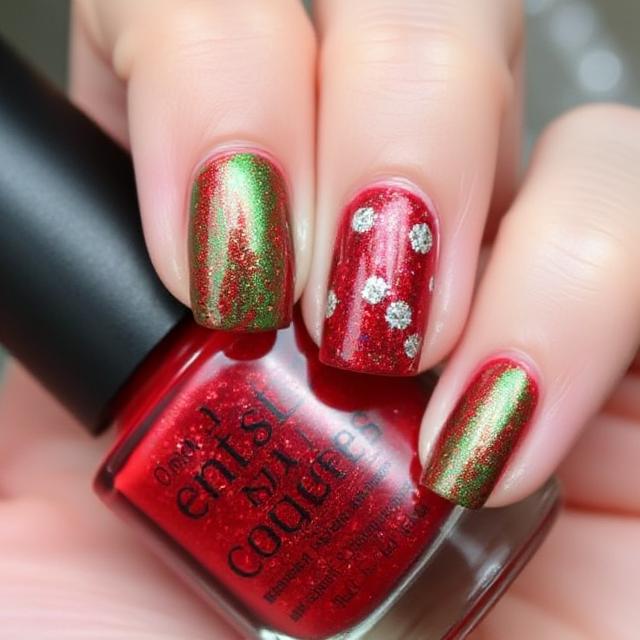
4. Glittering Ornament Nails
Transform your fingertips into tiny ornaments with this sparkling holiday nail design. Start with alternating red and green base colors on each nail, or go for a more uniform look by choosing just one festive shade. Then, using a glitter polish or foil, create round “ornament” shapes near the base of each nail. You can use a stencil or just freehand a large dot and then draw a little cap and string above it in gold or silver. These tiny baubles look just like the decorations on your tree! To elevate the look further, add rhinestones or metallic studs for that real-life sparkle. This is a perfect option for anyone who loves a bit of glam with their holiday cheer. The glitter reflects Christmas lights beautifully and adds a multi-dimensional effect. Finish off with a thick topcoat to keep everything smooth and sealed. These nails are a conversation starter and totally Instagram-worthy, making them ideal for parties or festive photo ops.
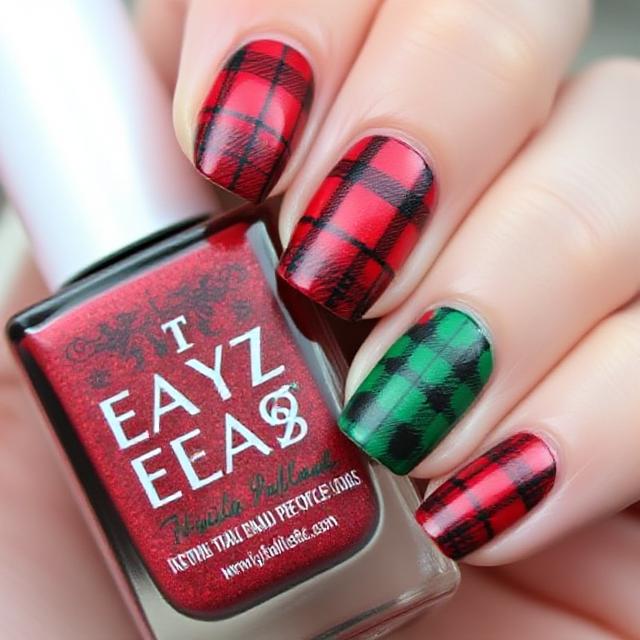
5. Cozy Plaid Perfection
Channel the vibe of your favorite flannel blanket with this cozy red and green plaid nail art. Begin with a matte red base coat—something a bit darker, like a burgundy or wine red, adds sophistication. Next, using a striping brush or nail art pen, draw thin green lines vertically and horizontally to form a plaid pattern. You can layer thinner black or white lines on top to add depth and texture. This design captures the essence of holiday comfort and pairs perfectly with hot cocoa and snowy nights in. It might take a bit more time to complete, especially if you’re new to nail art, but the result is well worth the effort. Plaid nails work particularly well with longer nail shapes like almond or coffin, offering more space for detail. Add a matte topcoat for a cozy fabric-like finish, or go glossy for a polished vibe. These nails feel like wrapping your fingertips in your favorite Christmas pajamas—comfy, stylish, and full of festive flair.
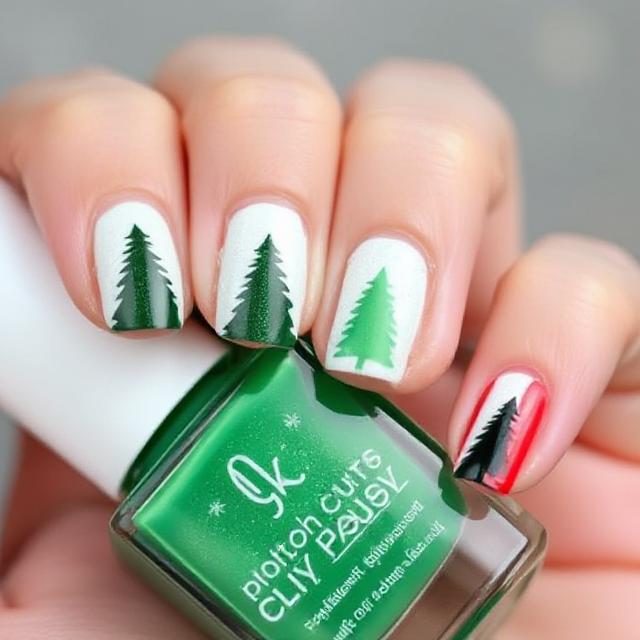
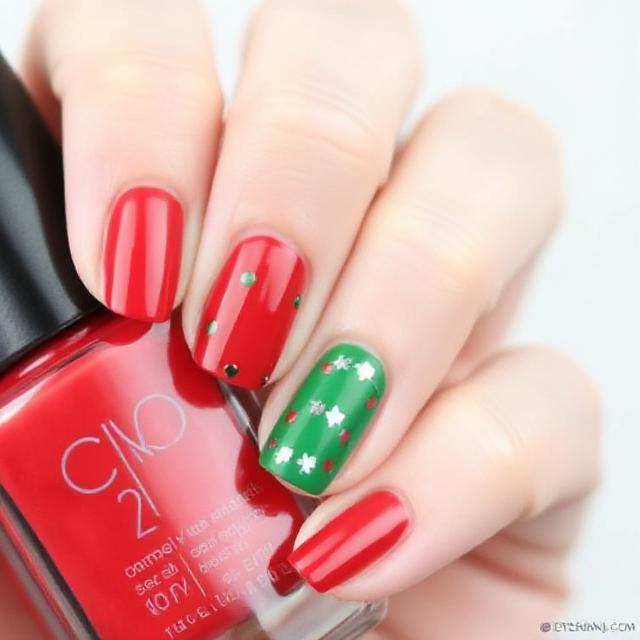
6. Christmas Tree Silhouettes
Let your nails be the canvas for beautiful Christmas tree silhouettes with this stunning holiday look. Start with a snowy white or midnight green base to make your trees stand out. Then, using a thin brush or nail art pen, paint triangular tree shapes in the opposite color—white on green, green on white. You can add little dots or strokes of red to mimic ornaments or garland. Some people love to top each tree with a golden star sticker or a tiny rhinestone for extra magic. This design is festive yet minimalist, allowing you to embrace the holiday theme without overwhelming your look. It’s also perfect for both short and long nails. To finish, apply a glossy topcoat to enhance the contrast and give your artwork depth. These nails look magical against cozy knits or while holding a mug of mulled wine. Whether you’re attending a family gathering or strolling through a Christmas market, your nails will reflect the joy and charm of the season.
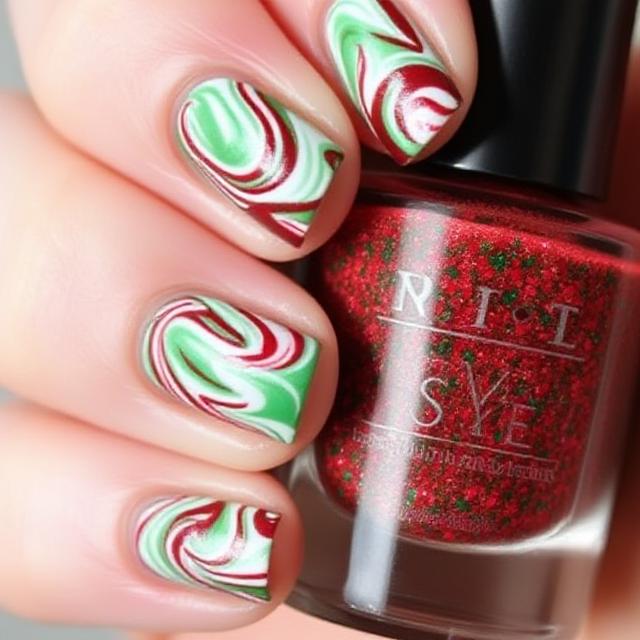
7. Peppermint Swirl Delight
Turn your nails into delicious candy with this peppermint swirl design that combines red, green, and white in a hypnotic pattern. Begin with a white base, then use a dotting tool or detail brush to create curved lines radiating out from a center point. Alternate between red and green swirls to mimic the look of classic peppermint candies. This design works beautifully on round or oval nails, but you can adapt it to any shape. It’s eye-catching and playful without being too complicated. For best results, work one nail at a time while the polish is wet to blend the swirls seamlessly. A shimmery topcoat adds to the candy-like shine and makes the colors pop. Peppermint swirl nails are a fun option for cookie exchanges, baking nights, or any event where whimsy and charm are welcomed. Plus, they’re totally sweet without adding to your holiday calorie count! These nails are an instant mood booster and a delightful nod to everyone’s favorite seasonal treat.
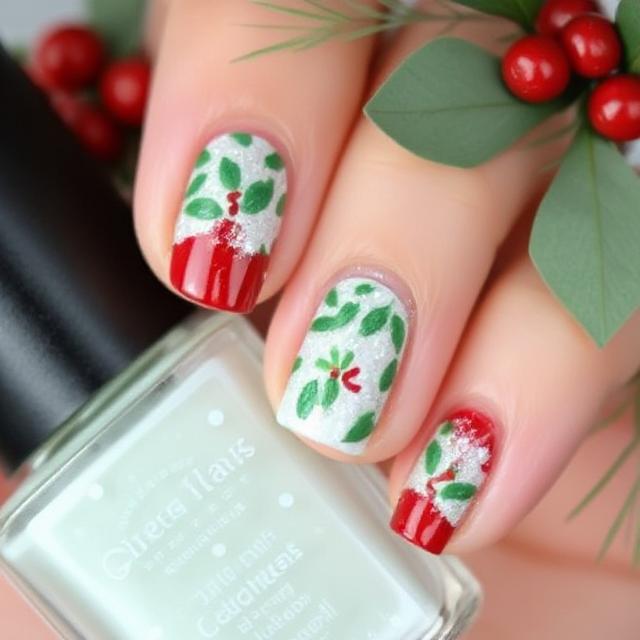
8. Snowy Holly Leaves
Nothing says “traditional Christmas” quite like holly leaves and red berries, and this nail design brings that classic motif to life. Start with a soft green base that evokes evergreen trees and winter foliage. Then, using a fine brush or stamping plate, paint or stamp dark green holly leaves across one or two accent nails. Add bright red dots to represent the berries, keeping them small and clustered for realism. You can also add a dusting of white polish to mimic freshly fallen snow. This design is beautiful, nostalgic, and steeped in holiday charm. For a more whimsical version, try cartoonish leaves or metallic accents. Holly nails pair well with velvet dresses and cozy scarves, making them ideal for both formal gatherings and casual celebrations. They’re subtle enough for everyday wear but still carry the unmistakable joy of the season. Seal everything with a high-shine topcoat to make the green and red tones stand out. It’s a lovely way to wear a bit of nature during the holidays.
9. Wrapped Like a Gift
Make your nails look like mini wrapped presents with this fun and festive design. Start with alternating red and green base colors across your nails. Then, using gold or silver striping tape or polish, create horizontal and vertical lines to mimic ribbon. Where the lines cross, add a little bow—either painted or applied with a tiny nail charm. This creates the look of a beautifully wrapped gift box. The design is simple to execute but delivers a huge impact, especially with metallic accents that reflect light. It’s the perfect nail art idea for gift-giving days or your holiday parties. You can keep the bows minimal or go full-on glam by adding rhinestones or 3D nail art elements. For a cohesive look, choose just one accent nail for the bow and keep the others striped. This festive idea instantly transforms your manicure into a work of art and brings the joy of giving straight to your fingertips. Finish with a gel topcoat to make your design last through all the unwrapping.
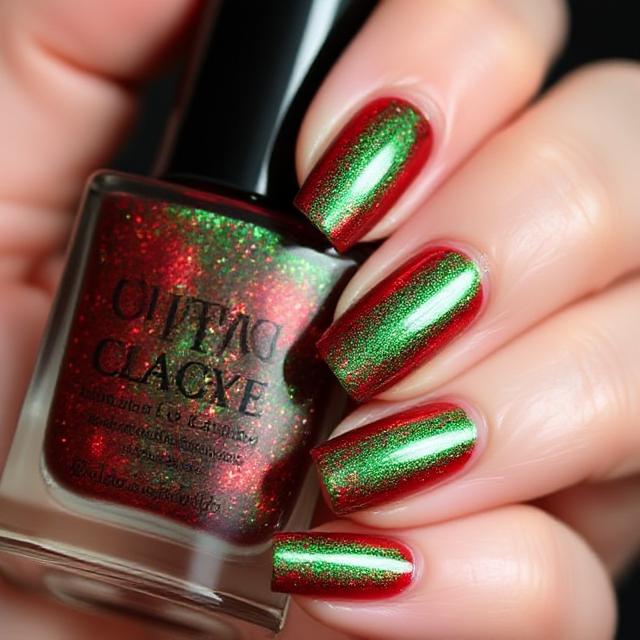
10. Red and Green Ombré Glow
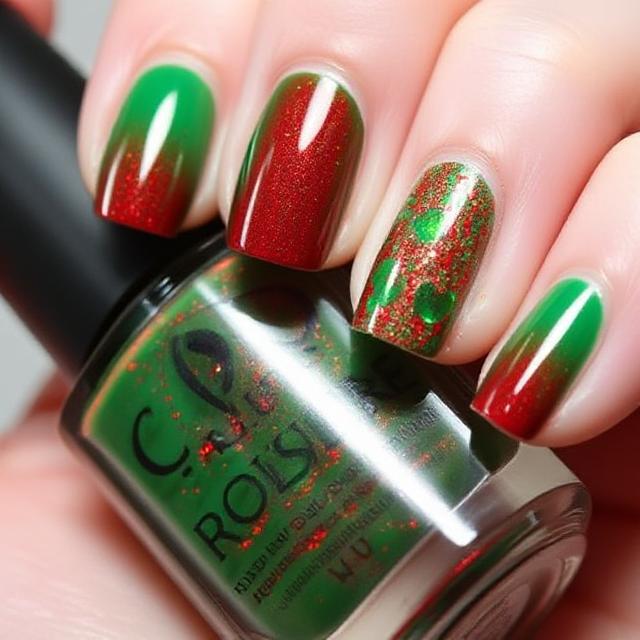
If you love subtle gradients and smooth transitions, this red and green ombré nail look is for you. Choose a deep red and forest green polish and blend them together with a sponge to create a stunning gradient effect. Apply the red at the base and green at the tip—or reverse it—for a different mood. You can also blend the colors from side to side across your nails for a modern twist. Ombré nails are elegant, trendy, and surprisingly easy to achieve at home. Add a touch of shimmer or glitter on top to evoke the glow of holiday lights. This design works well with almond or square nails and looks particularly beautiful in candlelight or under fairy lights. It’s a versatile look that can be dressed up or down depending on your outfit. Whether you’re attending a winter wedding or sipping cider by the fire, these nails offer the perfect balance of festive and fashionable.
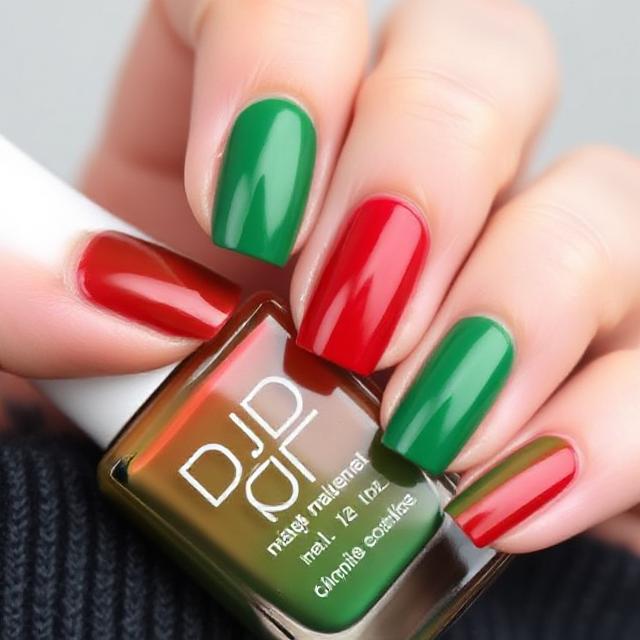
11. Minimalist Color Blocks
If you prefer clean lines and bold statements, try a minimalist red and green color-blocked nail design. Use tape or nail vinyls to divide each nail into two halves or thirds, then paint each section with either red or green polish. You can alternate the color placement on each finger for added interest. The result is sleek, modern, and undeniably festive. This look is especially striking on square or coffin-shaped nails and complements structured outfits like blazers or tailored dresses. For a bit more holiday sparkle, outline the blocks in metallic gold or silver. Minimalist doesn’t mean boring—it means intentional, stylish, and easy to pair with everything in your holiday wardrobe. It’s also a great option for nail art beginners since it relies more on taping than freehand work. Seal your look with a high-gloss topcoat for maximum impact. These nails show you can embrace the season without going overboard—sometimes, less really is more when it comes to holiday glam.
The beauty of red and green holiday nails lies in their endless versatility. Whether you gravitate toward playful candy designs or elegant minimalism, there’s a style to match your mood, outfit, and schedule. These easy designs allow you to get creative, add a personal touch, and bring seasonal joy to your fingertips. So, as the holidays approach and the world sparkles with lights and laughter, let your nails join in the celebration. They may be small, but their festive impact is huge. Happy painting, and may your holiday nails be merry, bright, and absolutely fabulous!